DIY Lovely Lavender Sachet

As you have probably figured out by now, Jim and I love going on outdoor adventures.  Unfortunately, these little escapades usually result in a not-so-sweet-smelling vehicle – So I decided to sew up a fragrant lavender sachet for my car to ward off any unpleasant scents.

It takes very little time to make and requires supplies you can probably find around your home!

Materials:

  • about 1 tablespoon dried lavender buds
  • two 3×3-inch pieces of fabric
  • scissors
  • sewing thread
  • sewing needle

Directions:

  1. Cut two identically-shaped hearts from fabric pieces
  2. Align the fabric hearts on top of one another and use a running stitch to sew them together
  3. Before finishing the stitch, fill heart with lavender buds and sew it closed
  4. Attach a loop of thread for easy hanging

This little heart packs a big punch!  Now I get a nice waft of fresh lavender every time I hop in my car … instead of  any lingering smells from our last adventure …

Enjoy!

P.S.  Not good with needles?  You can purchase one of these lovely lavender sachets right here!

DIY Simple Polymer Clay Bead Necklace

My sister and I wanted to get a little crafty last week and decided to make some polymer clay bead necklaces!

I don’t typically wear much jewelry, so I came up with a design that was simple, customizable and could be worn with pretty much anything:

Materials (all of these can be found at your local craft store or in your kitchen):

  • polymer clay (we used Sculpey Premo)
  • aluminum foil
  • baking sheet
  • toothpicks
  • paint brush
  • glaze (we used Sculpey Satin Glaze)
  • thin cording
  • scissors

Directions:

1. Roll clay into approximately 1-inch balls and poke a hole through the center using a toothpick.

2. Line a baking sheet with aluminum foil, place beads onto the sheet and bake the clay according to the package directions.

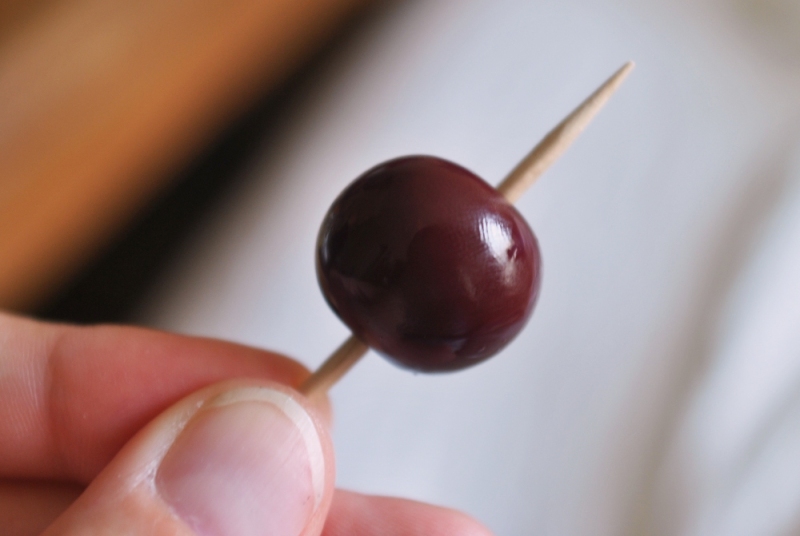
3. After beads have cooled, paint with two coats of glaze.  Hint: Use a toothpick to hold the bead while glazing to prevent it from getting all over your fingers.  (Skip this step if you want your beads to have a matte finish.)

4. Measure and cut cording to your desired necklace length.  Remember: Necklace must be long enough to fit over your head!

5. Once beads are completely dry, thread both ends of the cording through the center of each bead and knot to secure them.

6. Show off your new necklace!

Got questions or suggestions?  Leave them in the comments – I’ll meet you there!

Tutorial: DIY Cardstock Item Tags & Packaging

After reading this article on Lova Revolutionary’s blog, I was inspired to avoid purchasing the potentially pricey ready-made tags and create my own!

I decided to use neutral colors in my tagging because so many of my felt goodies are bright and vibrant and I wanted the items themselves to stand out and be the star of the show.  (I apologize in advance for the lit-from-above, incandescent awfulness of the photos but I was not about to essentially sit on my tiny window sill to get natural light while I was making these things …)  Okay!  So here’s what you do …

You Will Need:

  • Cardstock (in whatever colors you wish, make sure it is of a heavier weight so your tags have some structure, I cut mine to size before I began making them, you can size them according to your needs)
  • Glue Stick
  • Corner Punch (I use a simple rounded corner, there are some pretty fun ones out in the craft stores – Use what suits you!)
  • Stamp, Stickers, or Other Tools to decorate your tags (I am using a stamp with my Tufted Bird shop logo on it – Stamp was created by cupcaketree on Etsy, a great seller and wonderful communicator – I highly suggest her if you are interested in your own!)

Materials Needed

Instructions:

1.  Once cardstock has been cut to the appropriate size (will vary with what you choose to use your tags for), use the corner punch to round the corners of each piece.

Punch Corners

2.  Glue smaller piece of cardstock to the center of the larger piece of cardstock so the larger piece of cardstock extends an equal distance on each side, forming a “frame”.  (you can omit this step and use only one piece of cardstock for your tags if you wish, I prefer a sturdier, double-thick tag in this case because these will ultimately house my brooches when I am finished with them)

Glue Cardstock

3.  Adorn your tags with stamps, stickers, whatever you would like!  As mentioned before, I am trying to be more cohesive with my What. No Mints? brand and therefore I used a stamp with my logo on it.

Stamp!

4.  Once the glue completely dries (as well as any decorating you have done) you are ready to spice up your handmade items with your new tags!

My Red Delicious Apple Brooch pinned to my new tag!

Since I had everything out already, I also quickly threw together some simple and cute hang tags for keychains, etc.

Quick Hang Tags

That wasn’t so bad, right?

I love when crafters also hand make their packaging.  It adds an extra personal touch that I believe any customer would enjoy and appreciate.

Do you make your own packaging and/or tags?  I want to see them!  Comment with a link so we can check it out!

DIY Tufted Bird Paper Garland Kit!

So as you may have noticed, I have been in love with making garlands recently and came up with a less-expensive, more personal version of my Tufted Bird Felt Garlands.  I am introducing a DIY Tufted Bird Paper Garland Kit!

I like the idea of having people be a part of their handmade purchases and this kit is an easy and fun way to be involved and put a little bit of your own personality and style in your decorating.

The kit comes with paper birds, cotton string, cotton strips of fabric and instructions.  Very simple and easy to assemble and decorate.  You can color in the birds using whatever you choose – Or you can glue sequins and buttons and glitter to them to give them a more interesting texture and feel!  You can also leave the birds in plain black and white for a more neutral look.  I wanted to leave this kit open-ended so you can choose who you want your birds to be!

Included in Kit

Packaged & Ready to Go!

I made my own! I just can't get enough of these guys ...

Consider looking around for DIY kits when you get the creative itch (but would also like a little bit of guidance!) – It’s sweet knowing you had a hand (ha … ha) in making them :)